 |
 |
 |
 |
 |
 |
 |
 |
 |
 |
 |
 |
 |
 |
![]()
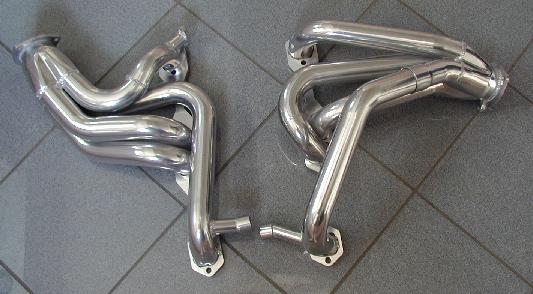
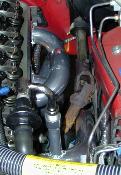
In October, 1999, I decided the JBA
shorty headers
needed to be replaced. The 1 5/8" primaries and 2 1/4" collector
ports, and stock y-pipe were a likely bottleneck, especially during
nitrous use. I'll know for sure once I get the car on the dyno. Of course,
I'd like to say I installed long-tube headers, but the ground clearance
(loss of about 2" of clearance) problems were just too much for the
car. I want to keep it lowered, and I do have to get up my driveway once
in a while. The solution that made the most sense to me was the 1994-5
Arizona Speed and Marine headers, mated to the Random Technology y-pipe
and catalytic converters. This will provide 1 3/4" primaries, 2
1/2" collectors, into a full 2 1/2" y-pipe that merges to the
single 3" Borla exhaust.
Parts
Other than headers and y-pipe, you’ll need header gaskets (I used SCE p/n 4611 LT1 copper gaskets, but lots of folks like the Felpro p/n 1406), “copper” high-temperature gasket sealer, anti-seize, Stage 8 header bolts p/n 8911, Mr. Gasket ultra seal collector gaskets p/n 720-5980, Stage 8 collector bolts p/n 8950, a new oil dipstick tube, and possibly new AIR fittings for the headers, depending on the specifics of what you’re going from/to. Of course you’ll need a variety of tools, and probably a 7/16” wrench that you can grind down such that it will fit between the bolts and the primaries, and also an Allen wrench for the bolts. At least one other helper for the install is really useful.
For bolts, you've got a couple options.
The issue is that the repeated heat/cool cycles that headers experience
will cause regular bolts to loosen up over time. The Stage 8 bolts have
retaining clips that you attach to the bolt heads, which keep them from
turning. They're a little trouble to install, but once on, you're set. If
you don't want to deal with these, I recommend getting ARP header bolts,
which have smaller heads, and are therefore easier to get a wrench around.
But with these or other normal bolts, you'll have to tighten them up
once a month or so for a while after the install, or you'll risk blowing
out a header gasket.
 Prep
Prep
Before you dive into this, a couple
tips. Make sure your new header flanges are flat (put a straightedge
against them), and don’t install them if they’re not pretty flat. You
can get them machined if necessary. I
also wrapped my headers with some of that medical wrap which sticks to
itself, so that I would avoid scratching them up during the install. This
worked very well.
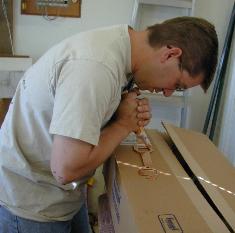
Disassembly

Put
the car up on nice solid ramps and stands, as high as will be safe, and
disconnect the negative battery cable. Remove the cross-brace and y-pipe,
just a bunch of bolts. Pull the O2 sensors (three of them on a ‘96-7
car) out of the y-pipe, or unclip the harnesses for them, before you drop
the pipe. The stock y-pipe is pretty heavy (39 lb.) and comes out in two
pieces, so be ready for the weight as you remove it. Remove the starter,
making sure that if there are any shims under it, you track where they
were for the re-install. Now up top, you’ll need to remove anything in
the way of your current exhaust manifolds or headers (I was removing JBA
headers), so that would include a strut brace, driver's side valve cover,
the alternator, pull the hoses off the AIR tubes and remove them from the
manifolds. Remove the EGR tube completely, you’ll probably need to put
some new kinks in it during re-install.
On
the driver’s side, the steering linkage may need to be removed. I had to
disconnect it to get the JBA headers out, and didn't put it back together
until after the AS&M's were in, so I really don't know if it's
necessary if you're only replacing stock manifolds. Each end
has a single bolt, which is removed, then you can slip off the linkage.
Check
and remove any spark plugs that will be in your way. I had to remove all
but #3. Then remove all the header bolts. I pulled the driver’s side out
through the top, but you could go out the bottom if you removed the oil
filter. The passenger’s side goes out the bottom. On the passenger’s
side, remove the bolt that holds the dipstick tube in place, and pull it
out. A screwdriver will help leverage it out, but I wouldn’t try to
re-use it. Any little bend in the portion of the tube that sticks inside
the block will keep you from getting it back in.
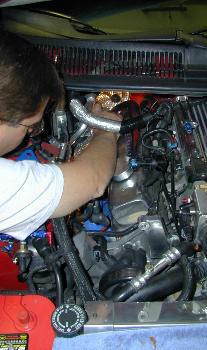
Assembly
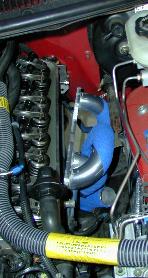
Both sides were about the same difficulty to install, so just pick one and start in. We started with the driver’s side, since the AS&M headers come with the #1 primary disconnected, which seemed easier (wrong!). Test fit the header to make sure everything looks good. Grab one of the header gaskets and a hammer, and pond out the ridge around the ports, so the whole thing is flat. Then test fit and port the gasket if necessary, to match your heads. A die grinder will work wonders here, far easier than a Dremel, which is probably the second choice. Hand-twist a couple bolts into the outer holes in the head, the ones that won’t have bolts in them through the header. You’ll hang the gasket on these while you put the header on. Run a nice bead of gasket material around each port on the gasket, both sides, then hang it on the bolts in the head, and gently push it against the head. This next part is easiest with two people. Grab and anti-seize a couple bolts, and, with one person above and another under the car, put the header in place and thread a couple bolts into place. Of course, you’re trying not to mash all the gasket material out of place while you do this. It’s probably a good idea to figure out beforehand which spots are easiest to get the first two bolts into, so you aren’t fiddling around and dropping the bolts. Once you get a couple bolts in, you can slip fit the #1 primary (assuming yours is separate from the others), and get it lined up too. This took some muscle, and needs to be done before the rest of the header is pulled up tight to the head. Then put in the rest of the bolts, and tighten them down, and reinstall the steering linkage.
The passenger’s side is basically the same, except for the dipstick tube. It needs to be routed between the #6 and #8 primaries, and it may help to do this while the header is sitting in the engine bay, but before you tighten the bolts down (and before you goo up the copper gasket, because it will take some time). The key on the dipstick is to make sure you don’t bend the part that slips into the block, while you’re bending the rest of the tube. You need to get it bent such that the lower portion is pointing the exact right direction to go straight into the block. It will not go in otherwise, and don’t expect to push the tip in at even the slightest angle, and have it straighten out as it goes in. Just keep bending the upper part a bit (the tranny makes a nice place to bend against) until the lower portion is facing correctly, then it will slide in. We lubed it up a bit with motor oil before it went in. Once that’s bolted in, then the header can go in, just like the driver’s side.
Install the O2 sensor into the driver’s side header (at least on the AS&M and JBA headers, the front passenger’s side O2 sensor is in the y-pipe). I had to lengthen the wire for it, since the collector is lower now.
Plugs and wires can now be re-installed. This may be easier or harder than before, depending of the particular header. In my case the #2 plug is the worst. You may also need a longer #8 plug wire – that’s probably the tightest fit. I used the stock wire length (Moroso Blue Max wires), and it just barely reached.
That’s the tough part, you’re done. Put back on any of the stuff in the engine bay, the alternator, reconnect AIR tubes, re-shape and hook up the EGR tube.
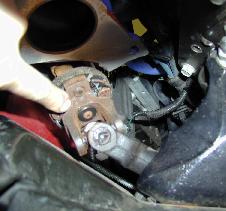
Back underneath the car, the rest should be pretty obvious. Some y-pipes go right over your starter, so you’d need to install the starter first (make sure the shims are right). Use the dead soft gaskets for the collectors (I didn’t use the copper gasket stuff on these), and put the y-pipe in. In my case, the Random Tech y-pipe doesn’t come close to fitting up to my Borla cat-back, so I’ll have to get a short pipe bent and welded up for that.
Be prepared when you start the
car up for the first time. The headers will smoke like crazy, and you'll
think the engine bay is about to catch on fire. Hang on, it'll clear in
about five minutes...
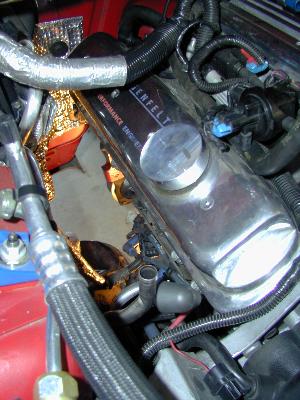
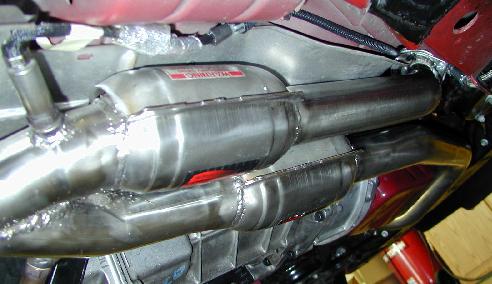
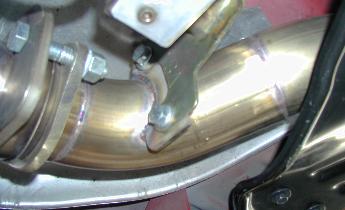 As
I mentioned above, the y-pipe doesn't connect to the collector. Turns out
this was a dumb move on my part. Thunder Racing had provided a short
"s-pipe" but it was in the bottom of a huge box under a pile of
peanuts, and I didn't see it. Anyway, I found a place locally that does excellent
work with stainless steel, and they made up this mandrel-bent pipe with a
stainless flange on the front, and welded it up to the Borla. Great work,
but not cheap.
As
I mentioned above, the y-pipe doesn't connect to the collector. Turns out
this was a dumb move on my part. Thunder Racing had provided a short
"s-pipe" but it was in the bottom of a huge box under a pile of
peanuts, and I didn't see it. Anyway, I found a place locally that does excellent
work with stainless steel, and they made up this mandrel-bent pipe with a
stainless flange on the front, and welded it up to the Borla. Great work,
but not cheap.
Conclusions
Other than lots of scratches and scrapes, this isn’t that difficult of a job. It gets tedious putting twelve Stage 8 bolts and retaining clips in, 8 plugs and wires, etc, but it’s doable. Having a friend help is great, even just for moral support (like, when you have that desperate thought about just putting it back the way it was before you started this project!)
Thanks to Dave
Burrow for some nice pics and tips.
Problems
An extremely common problem after installing headers is to have burned plug wires. I did, and it seems like practically everyone does. The first sign is usually a very rough running engine at low RPM. 6th gear on the freeway will feel like the engine is going to shake right out of the car. If this happens, you'll need to check the wires, looking for places they might be touching the headers. Also look for wires that have simply fallen off, and worst case -wires you've installed onto the wrong plugs. The cover on the optispark lists the plug numbers for each wire, and you may need to start from there and follow each wire.
|
Copyright © 1997-2004 David Mills, no part of this site (http://www.go-fast.org/) may be reproduced without permission of the author. The author makes no claims or guarantees as to the quality of the information on this site. I'm an enthusiast just like you, and while everything here is correct as I know it, I'm not responsible if your car breaks. |