 |
 |
 |
 |
 |
 |
 |
 |
 |
 |
 |
 |
 |
 |
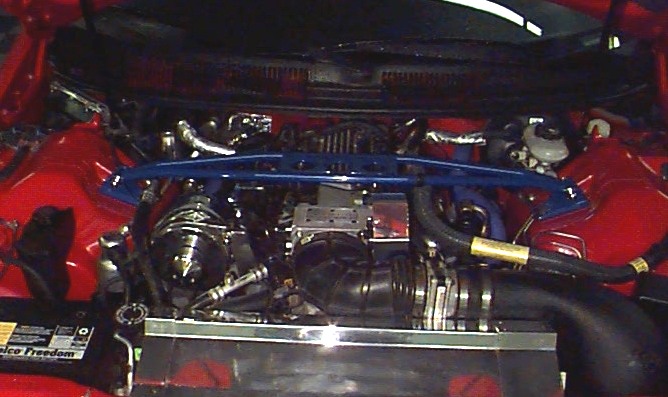
I've spent quite a bit of time cleaning up the engine bay in this car, and thought I'd share some tips. Lots of folks think this is an impossible task, and it's not, you just need to tackle one project at a time. Others don't care about the looks of their engine bay, and I can certainly understand that too! Even though I've spent a lot of time at the polishing wheel, this would not be considered a top-notch show car job. There isn't much "custom" work here, but mostly cleanup of the stock engine bay.
Polishing Aluminum
Many of the existing stock parts in the engine bay are aluminum. All of these will polish up very well, with the appropriate tools and elbow grease. For example, the alternator will polish, all the fittings on the AC and coolant lines, hose clamps, MAF, fuel rails and intake manifold, hard brake lines, and throttle body. Polishing these parts will make a huge difference in the look of your engine bay!
Tools
") You'll need a standard bench
grinder, with a couple polishing wheels. If you don't have a grinder already, I'm using a
small bench grinder with two 6" wheels. Cost at Home Depot was about $45. Configure
the grinder with a sanding wheel (with grits from 200-400), a sisal cotton buffing wheel and a sewn cotton cloth wheel. You'll
also need some polishing abrasive compound.
You'll need a standard bench
grinder, with a couple polishing wheels. If you don't have a grinder already, I'm using a
small bench grinder with two 6" wheels. Cost at Home Depot was about $45. Configure
the grinder with a sanding wheel (with grits from 200-400), a sisal cotton buffing wheel and a sewn cotton cloth wheel. You'll
also need some polishing abrasive compound.
In addition, a hand-held Dremel is very useful, for getting into small areas, and to grind larger amounts of material with a stone. Get a variety of stone, sandpaper, and cotton attachments. I also purchased the Dremel extension, which is a flexible shaft that attaches to the Dremel, allowing you to reach in to narrow areas more easily.
 Rough Grinding
If at all possible, remove the part to be polished from the car first - you'll make the job much easier. Then, based on how rough the part is, decide whether to use: a stone grinder in the Dremel (removes material fast, but leaves a pretty rough surface), a sanding wheel in the bench grinder (removes quite a bit of material, depending on the paper grade, and is great for flat surfaces), the sisal cloth wheel, or the sewn cotton wheel. Start with the roughest tool necessary, no need to shine up a rough surface, only to have to grind it back down later. With all the tools, make sure to keep them moving across the surface, especially the Dremel, as it's easy to create a concave scoop out of the aluminum. Work your way down to a relatively smooth surface with the stone and/or sandpaper. Remember, the cloth wheels won't take out significant gouges, you must get them out with the sandpaper. I've found that a worn sandpaper wheel is good to keep around, it'll act like a more fine sandpaper.
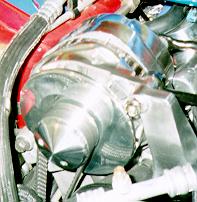
The alternator is shown to the right, before polishing. It's got the MBA fan, and March pulley with cover, but the rest of the alternator is the stock cast aluminum.
 Polishing
Once the part is relatively smooth, you can move on to polishing with the cloth wheels. Start with the sisal wheel, where you can still take a fair amount of material off the surface of the part. Then move to the cotton wheel to get a mirror shine. Both the cloth wheels should be used in conjunction with a polishing abrasive.
Here's the alternator, after polishing. I removed it from
the car and disassembled it before polishing. I also polished the brackets on the front
and rear.
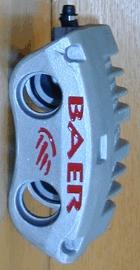
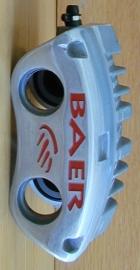
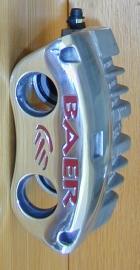
Here are pics of my brake calipers, from the rough cast surface they came with, then a sanded surface (400 grit paper on bench grinder), and finally a polished (felt on the grinder)
 |
 |
 |
Stainless Steel Bolts
The other thing I've done is to replace a lot of the bolts in the engine bay with polished stainless steel. This takes some time, as each bolts must be removed, measured, ordered and polished. It does make a huge difference, though, especially when the bolt is on one of your newly-polished aluminum parts. I've purchased all the bolts from a company called Totally Stainless, they've got a large selection of both metric and standard sizes. Get their catalog, and go at it!
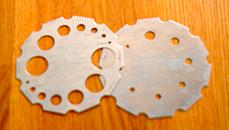 Measuring bolts is easy, if you have the right tool. You need to know
the shaft diameter (the outside of the threads), the thread pitch, and the bolt length
(without the head). I use a thread gauge wheel made specifically for this purpose. The
only place I've seen this available is from Griot's
Garage (part 92384, set of four). You measure the diameter by pushing the bolt through
the holes, and thread pitch is measured by lining up the teeth around the outside of the
wheel against those in the bolt. Measure the length with a ruler.
Measuring bolts is easy, if you have the right tool. You need to know
the shaft diameter (the outside of the threads), the thread pitch, and the bolt length
(without the head). I use a thread gauge wheel made specifically for this purpose. The
only place I've seen this available is from Griot's
Garage (part 92384, set of four). You measure the diameter by pushing the bolt through
the holes, and thread pitch is measured by lining up the teeth around the outside of the
wheel against those in the bolt. Measure the length with a ruler.
Polishing the bolts is essentially the same as for aluminum, except that stainless is a lot harder than aluminum (but softer than steel). If the bolt has numbers stamped on the head, grind them off with a stone or sandpaper in the Dremel, then use the polishing wheels as with the aluminum.
When installing these bolts, use anti-seize on them, because stainless will gall easily, and you'll never get them back out.
") Even stock hose clamps
polish up nicely, on a bench grinder
Even stock hose clamps
polish up nicely, on a bench grinder
Hose Clamps
Most standard hose clamps will polish up real nicely on the cloth wheels. You can also purchase polished stainless steel hose clamps from Totally Stainless. I've also replaced some of those ugly GM clamps with standard polished ones.
Maintenance
Over time, aluminum will oxidize, and need some shining up. You can use any of the aluminum polishes (I like Nevr-Dull) to touch it up. Aluminum will hold its shine better if you apply a coat of wax or polish to it, though. You can also spray a heat-resistant clear coat on polished aluminum, which will hold quite well and keep the shine without oxidization. I've been happy with products from Eastwood Co. for this purpose.
Bright Works, Inc - buffing wheels, polishing compound
Totally Stainless - stainless bolts, nuts, buffing wheels & compound
1709 Old Harrisburg Rd.
Gettysburg, PA 17325
1-808-767-4781
|
Copyright © 1997-2004 David Mills, no part of this site (http://www.go-fast.org/) may be reproduced without permission of the author. The author makes no claims or guarantees as to the quality of the information on this site. I'm an enthusiast just like you, and while everything here is correct as I know it, I'm not responsible if your car breaks. |